First of all, I did some sewing in 4-H but keep in mind that was 14 or 15 years ago that I last sewed.
Secondly, the directions were originally from the website sewinginnomansland.com. She is apparently a more experienced seamstress than I as is evidenced by the fact that she didn't give a lot of details. Fortunately for me, my mom is more experienced than I and she has our shared sewing machine at her house. Thus the trip to Mom's House.
So, let's get started!
Step 1: Pick material. Mom had some scraps so instead of buying material on my first try, I used some of hers. Here were my choices:
The picture is supposed to go the other way; not sure how to change it.
Talk about "Throwback Thursday" ~
the top material my mom bought YEARS ago
(literally, she made a maternity shirt for herself out of it. She hasn't been pregnant in 30 years!)
the second material was for a dress for me when I was young
the third was another one my mom has had FOREVER
the fourth was my Easter dress in 7th grade that I loved
the fifth & sixth were from one of my 4-H projects
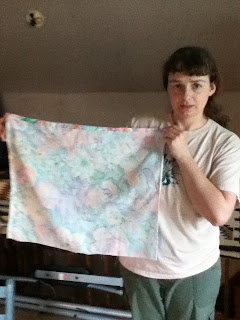
I showed the material to DD and asked her to pick. She picked the flowered print that was left-over from my Easter dress!
We held it up to her to measure for length and width. I originally wanted knee-length so it was modest yet she could still easily move around in it. When we held the material up and wrapped it around her we realized it was perfect for an ankle length skirt. I decided to leave it that length. We also guestimated the width would be fine.
Step 2: Make a tube
I ironed the material, folded over the hem, ironed it to help it stay while I sewed then sewed it up.
Then I put right sides together and sewed up the open end, creating this beautiful tube:
Step 3: After a diaper change break, we came back to use a long stitch and gather the top of the skirt together. I also had to sweet talk DD into holding still long enough to measure the elastic for the waist band. This is where we had a mis-calculation. I just held the elastic around her waist, allowed an extra inch for overlap and cut it off. Since it's elastic I should have pulled it a bit tighter so it would need to stretch, which is what elastic does. Also, 2" elastic would probably work better. Anyway, I took my length of elastic and sewed the ends together.
Step 4: This is the step where team work came into play. My mom started to pin the elastic to the skirt, getting the "bunches" all as even as possible so it wouldn't all bunch up in one spot while I got DS down for a nap. Then it became "all hands on deck" as we had to sew the elastic to the skirt while keeping the elastic stretched. And the bunches even. We soon discovered that it was going to take 3 or 4 hands. I'm sure it was a funny sight seeing my mom & I both at the sewing machine with both hands underneath it guiding & stretching material & elastic. I guess we'll never know, though, because a picture was the last thing on our minds!
It really was quite easy and quick. It took about 2 hrs start to finish and that included the afore mentioned breaks. The trickiest part was the waist band.
Here is the finish product:
It kind of bunches around her waist funny but I think with something underneath (since it is thin material) and her shirt tucked in it will be fine. And lots of room to grow!


Smile Holly!:) We should sew together sometime, you could teach me some things!!!
ReplyDeleteThat would be fun!
Delete