Thursday, May 30, 2013

*Not so* (Red Velvet) Cheesecake Brownies


This pan is about to receive the perfectly blended ingredients for...

 
Orange Velvet?  Hmmm...not looking so red.  Maybe some more red food coloring would be good?
 
 
Brownie layer
 
 
Baking away!
 
Here is the recipe if you, too, would like to make Red Velvet Cheesecake Brownies:
 
(originally pinned from http://doughmesstic.com)
 
Ingredients
  • 10 Tablespoons butter
  • 3 ounces dark or semisweet chocolate, chopped
  • 1 1/4 cup sugar
  • 2 large eggs
  • 2 teaspoons vanilla
  • Red Food Coloring (I used 6 drops - obviously not enough!)
  • 3/4 cup All Purpose Flour
  • 1/4 teaspoon salt
  • 2 tablespoons Unsweetened Cocoa Powder
  • For the Cheesecake Layer
  • 8 ounces Cream Cheese, softened
  • 1/3 cup sugar
  • pinch salt
  • 1 large egg
  • 2 teaspoons vanilla
Instructions
  1. Preheat oven to 350. Prepare 8x8 baking pan with parchment paper long enough to hang over on two sides, making it easier to remove from pan once baked. Spray pan and paper.
  2. In small saucepot over medium heat, or in the microwave, melt chocolate and butter until smooth. Allow to cool slightly.
  3. In a separate bowl, beat eggs, vanilla and red food coloring with the sugar. Slowly add in chocolate mixture until well combined.
  4. In small bowl, sift together cocoa, salt and flour. Add mixture to rest of batter. Do not overmix.
  5. Pour batter into prepared baking pan.
 
    For the Cheesecake Layer
  1. Beat ingredients together until smooth. Pour over brownie batter. Use sharp knife to swirl together.
  2. Bake 1 hour to 1 hour 10 minutes, or until just set and toothpick inserted comes out clean. Allow to cool. Enjoy!
I baked it for 1 hr then checked it.  The toothpick came out clean but when we ate them they just seemed a little done.  Not burnt, just a little done.
 
Brownie anyone?


I decided to make these brownies as a special thank you treat for my Hubby.  He is a member of our local CERT (Community Emergency Response Team).  This week they were activated to a near-by town who was on a boil order.  They unloaded many bottles of water, set up a distribution center and delivered to those unable to make it to the distribution center.  He worked hard on the days he was able to go and wished he could be there on the days he couldn't be.  Don't ever underestimate the hard work volunteers do for their community.  Be sure to thank your local emergency responders!
 
So what was the verdict? 
"They were good, although a little done so you'd probably better keep practicing." 
I think that's his way of asking me to make them again!
 
These brownies may have been made for a serious cause but I couldn't resist a silly selfie!


Monday, May 20, 2013

Stinky, Stinky, Stinky!

So, you know those problem areas that just get a funky odor?  Things like trashcans, sink drains, shoes??  Did you know that baking soda is an odor neutralizer?  I have used baking soda to help neutralize odors in all of those locations.


Trashcans:  When changing the bag, sprinkle some baking soda in the bottom of the can.  I especially noticed the improvement in my 3-yr-old's diaper can!

Sink Drains:  Pour a kettle of boiling water down the drain.  Put in 1/3 cup baking soda.  After a few moments, pour down a mixture of vinegar and hot water (I've seen 1 cup each.  The first time I tried it I only had 1/3 cup vinegar and then just added enough hot water to get to 1 1/2 cups).  Let it sit 15 - 20 mins and follow up with another kettle of boiling water.

Shoes:  Not to embarrass my hubby or be disrespectful or anything rude like that, but his shoes (especially his work shoes) can be downright nasty!  Unfortunately, our daughter has stinky feet issues, too.  So last Friday night after hubby was in bed I snuck some baking soda into the bottom of his work boots.  I haven't been brave enough to stick my nose down them yet but he's only worked 5 hrs since then so it hasn't gotten a real tough work-out.  It didn't bother his feet, though, so there may be hope for stink-less feet at the Ridenour house!!  Woo-Hoo!!


Now for some animal stink... does the odor of zoos bother you?  All those stinky animals doing their stinky animal thing all together?  It doesn't bother me but I suppose growing up on a farm may help in that area.  Well, I have a solution to make the zoo less stinky...

It is...

Make your own!!  And here you thought I was going to say 'baking soda,' didn't you?!

No, if you're looking for a fun activity with your toddler, you totally need to make your own zoo.  It's really easy;  all you need a bunch of stuffed animals and a laundry basket.  Here's some pictures of the one DD and I made this afternoon:


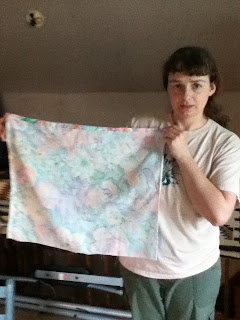
We gather a bunch of stuffed animals in an old laundry basket.  I put a blue pillowcase on her pillow and the duck & the alligator got to enjoy their natural habitat!  We gathered the animals then we came back into her room, using a telescope to look for animals.  We played with the stuffed animals then got her sandbox bucket and "fed" the animals.  Very simple but a great time with my little girl!  After about 20 mins we climbed on my bed to have a snack (lemonade, wild berry, raspberry twizzlers) and after a few minutes she decided we need to share with the animals.  So we played for a few more minutes then she took me by the hand and said, "Let's watch a movie!"  So we snuggled for awhile in front of the TV. 
 
Considering the events in OKC today, it doesn't hurt to have some simple bonding time activities up a parents' sleeve.  Remember to hug your kids tight!  They are a gift from God!


Credits: 
Baking Soda ideas:  www.beautyandbedlam.com
(Drain cleaner slightly different - I must have combined with one I had read somewhere else)
Zoo idea:  simplekids.net


Thursday, May 16, 2013

Frozen Strawberries & Cream Dessert

I don't know what the weather is like where you live but it's been hot & humid here (or at least warm & humid).  Summer weather calls for a summer treat so tonight I made a frozen strawberries & cream dessert. 

This recipe also calls for the use of the food processor and I'm pleased to report that it worked much better this time!  See?

 
DD was excellent help breaking up the graham crackers.  There is also some pecans in there.
 
I processed that until fine then added melted butter, flour and brown sugar.
(Don't worry - the exact recipe will be at the end)
 
 
Little blurry but DD was stirring away!
 
While this mixture was "baking" in the oven, I got to separate a couple eggs.  Now don't laugh but I'd never separated eggs before.  First time = success!! 
 
 
Blending egg whites & sugar.
 
 
Squeezing lemon juice
 
Doesn't this look yummy?!
 
 
Almost ready for the freezer!


Now we wait...
 
 
And it was worth it!


Recipe originally pinned from www.pipandebby.com
 
 
Ingredients:
 
1/4 cup pecans
4 graham crackers, broken into pieces
10 tbl. melted butter
1 cup flour
1/3 cup brown sugar
2 egg whites
1/2 cup sugar
1 cup heavy whipping cream
juice from 1 lemon
4 oz softened cream cheese
2 cups strawberries


Instructions:
 
Preheat oven to 325.  Spray 8x8 pan with cooking spray and set aside.
 
In a food processor, combine pecans and graham crackers.  Process into fine crumbs.
Add crumbs to large bowl with butter, flour & brown sugar.
Mix well.  Spread crumbs evenly on a rimmed baking sheet lined with parchment paper.
Bake in the preheated oven for 20 mins, stirring half-way through.
 
Meanwhile, in a medium bowl combine egg whites & sugar. 
Using a handheld mixer, mix on medium speed for 3 mins.
Add whipping cream.  Mix on medium speed for another 6 mins.
Add lemon juice & cream cheese.  Mix on low speed until creamy.
 
Coarsely chop strawberries.  Gently fold strawberries into cream mixture.
 
Press half the crumb mixture into the prepared baking dish.
Top with strawberry/cream mixture.
Top with remaining crumbs.
Cover with foil and freeze for at least 3 hrs.
 
 
I'm thinking about trying this again for the 4th of July with a combination of strawberries and blueberries.
 
Enjoy!


Saturday, May 11, 2013

Blueberry Pie Bars

Tonight DD and I made Blueberry Pie Bars.  Really easy, except for one problem:


This is my food processor overflowing with flour, sugar and butter!  It totally was not big enough to do the job for me so I put it all in a bowl and tried to use my hand mixer.  The butter was supposed to get blended evenly throughout but still be crumbly.  Um, yeah, the hand mixer didn't work, either so I pulled out the amount I was supposed to save for the topping and just pressed the rest into my pan as best I could.  I wasn't sure how I was going to get the topping to crumble and was about ready to get out the food processor again when DD came to the rescue!  She thought the topping looked fun to play in (keep in mind, she's 3!) so she started playing in it.  I started to tell her to stop when I realized what she was doing was crumbling it so we crumbled by hand!  A more fun, hands-on approach that worked great for my little assistant!

This next picture shows it ready to go in the oven.  I'll share the recipe and then post a picture of the finished product!

 
Originally pinned from lifessimplemeasures.blogspot.com


Ingredients:

Crust and Topping:

1-1/2 c. all purpose flour

3/4 c. sugar

1/8 tsp. salt

3/4 c. unsalted butter, chilled


Filling:

2 large eggs

1 c. sugar

1/2 c. sour cream

3/8 c. all purpose flour

1/2 tsp. almond extract

16 oz. fresh blueberries


Directions:


  1. Heat oven to 350°F.  Grease an 8x8-inch pan with non stick cooking spray; set aside.
  2. For the crust, combine the flour, sugar, and salt in a food processor.  Cut the butter into 1/2-inch pieces and add to flour mixture.  Process until the butter is evenly distributed but the mixture is still crumbly (about 30 to 60 seconds).
  3. Reserve 1-1/2 cups of the mixture for the topping; set aside.  Press the remaining mixture into the bottom of the prepared pan.
  4. For the filling, whisk eggs in a large bowl, then add the sugar, sour cream, flour, and almond extract.  Gently fold in blueberries.  Spoon the filling over the crust and sprinkle the reserved topping mixture evenly over the filling.
  5. Bake 45 to 55 minutes or until top turns golden brown.  Cool 1 hour before cutting and serving or serve out of pan cobbler style.

Yield: 16 bars


Yummy!  And Hubby really liked it, too!


Thursday, May 9, 2013

Mother's Day Skirt for DD

I spent the day at my mom's today with the intent of working on a sewing project; a skirt for DD.  I'm really excited about this project, which our church family will be able to see in person on Sunday (Mother's Day)!

First of all, I did some sewing in 4-H but keep in mind that was 14 or 15 years ago that I last sewed.
Secondly, the directions were originally from the website sewinginnomansland.com.  She is apparently a more experienced seamstress than I as is evidenced by the fact that she didn't give a lot of details.  Fortunately for me, my mom is more experienced than I and she has our shared sewing machine at her house.  Thus the trip to Mom's House. 

So, let's get started!


Step 1: Pick material.  Mom had some scraps so instead of buying material on my first try, I used some of hers.  Here were my choices:

 
The picture is supposed to go the other way; not sure how to change it.
Talk about "Throwback Thursday" ~
the top material my mom bought YEARS ago
(literally, she made a maternity shirt for herself out of it.  She hasn't been pregnant in 30 years!)
the second material was for a dress for me when I was young
the third was another one my mom has had FOREVER
the fourth was my Easter dress in 7th grade that I loved
the fifth & sixth were from one of my 4-H projects
 
 
I showed the material to DD and asked her to pick.  She picked the flowered print that was left-over from my Easter dress!
 
We held it up to her to measure for length and width.  I originally wanted knee-length so it was modest yet she could still easily move around in it.  When we held the material up and wrapped it around her we realized it was perfect for an ankle length skirt.  I decided to leave it that length.  We also guestimated the width would be fine.
 
 
Step 2: Make a tube
I ironed the material, folded over the hem, ironed it to help it stay while I sewed then sewed it up.
Then I put right sides together and sewed up the open end, creating this beautiful tube:


Step 3:  After a diaper change break, we came back to use a long stitch and gather the top of the skirt together.  I also had to sweet talk DD into holding still long enough to measure the elastic for the waist band.  This is where we had a mis-calculation.  I just held the elastic around her waist, allowed an extra inch for overlap and cut it off.  Since it's elastic I should have pulled it a bit tighter so it would need to stretch, which is what elastic does.  Also, 2" elastic would probably work better.  Anyway, I took my length of elastic and sewed the ends together.
 
Step 4:  This is the step where team work came into play.  My mom started to pin the elastic to the skirt, getting the "bunches" all as even as possible so it wouldn't all bunch up in one spot while I got DS down for a nap.  Then it became "all hands on deck" as we had to sew the elastic to the skirt while keeping the elastic stretched.  And the bunches even.  We soon discovered that it was going to take 3 or 4 hands.  I'm sure it was a funny sight seeing my mom & I both at the sewing machine with both hands underneath it guiding & stretching material & elastic.  I guess we'll never know, though, because a picture was the last thing on our minds!
 
 
It really was quite easy and quick.  It took about 2 hrs start to finish and that included the afore mentioned breaks.  The trickiest part was the waist band.
 
Here is the finish product:
 
 
It kind of bunches around her waist funny but I think with something underneath (since it is thin material) and her shirt tucked in it will be fine.  And lots of room to grow!


Monday, May 6, 2013

Just checking in...

Hey Everyone!

It's been about 1 1/2 wks since I started my blog.  I have enjoyed watching the count of how many people have read my blog.  It's been a few days since I last wrote so I thought I'd check in while I sit here waiting for my fingernail polish to dry.  I'm neater at painting nails than I used to be but hopefully they look ok for work tomorrow.  It may not have been the smartest move ever; I still have to take a shower tonight! We'll see if any of it survives!  Oh, well; I blame Pinterest!  I was looking at my board labeled 'cool stuff' this morning and found a pin where someone had put glitter in between layers of fingernail polish.  It looked really cool but I didn't want to take the time to figure that out.  However, I decided Mommy could use some fingernail polish.  I had some given to me right after DS was born that I hadn't had a stretch of time to use it in so tonight I made time.


I do have a couple other misc posts that could be made:

Peroxide first!  Of course!  Did you know you can clean your toilet with peroxide?  One day I wanted to clean my toilet but couldn't get my toilet bowl cleaner open so, having remembered I had heard this was possible I googled it.  Sure enough, all you got to do is pour some in the toilet bowl and over the brush then brush the toilet bowl!  Big disappointment:  No bubbles!  That's why I like to use peroxide (it bubbles all up and is cool!).  It did work, though and I was able to have a clean toilet!  Yay!!  No pics because I was seriously NOT posting a picture of my disgusting toilet.

Does anybody here do eMeals?  I do because my mom got a subscription for me for Christmas.  I love it!  BUT. when I'm cooking I don't know what to do with my recipe.  They come in an e-mail and you print each week out so when I'm cooking I have a 8x10 sheet of paper to keep clean and dry.  Check this idea!


A baby hangar attached to an upper cupboard door!  It's so easy and I love it!


Until next time ... keep pinning!


Thursday, May 2, 2013

Peroxide at the Gate

Have you ever thought of your mouth as a gate?  It is, you know.  It's the gate that all food you ingest passes through. 

So today's peroxide post is about cleaning toothbrushes & dishwashers; both things that affect your gate.


The toothbrush was really easy; simply soak your toothbrush in peroxide.  One thing I read said in between brushings.  I didn't keep track of how long mine soaked but it was definitely overnight.  It bubbled up really good as you can see from the pic, which kind of grossed me out thinking that junk was in my mouth but my mouth felt great the next time I brushed!


Project #2 was my dishwasher.
 
I started out by using some liquid dish soap and a paper towel to wipe down the racks and the sprayer arm.  I also used a toothpick to check for food chunks in the sprayer arm.  Fortunately, none there!  Then I got another paper towel & more dish soap and did around the door & seal.  Last step was to pour 2 cups of peroxide in the bottom and run the dishwasher on the pan setting.  As you can see from my before and after pics, it did help but it was pretty icky to start with so it didn't completely clean up.  I think this is a job that needs to go in the regular cleaning routine.
 
Dishwasher Before:
 
 
Dishwasher After: