Sunday, July 27, 2014

Double Cheese and Sweet Onion Dip

I'm a sucker for anything with cheese in the title so when I saw this double cheese and sweet onion dip, I just had to try it!  I was so focused on the cheese I didn't anticipate the strong onion taste but since it's sweet onion, it's a good flavor.  Without further ado...

Cream cheese, mayo (I used Miracle Whip because that's all DH will allow in the house - lol), grated cheese ( I used Mexican since I left out the optional cayenne pepper), sweet Vidalia onion and pepper


Mix it and pour it in a greased pie plate.  Sprinkle more cheese on top!


Yummy!!


The day I made the dip I served it with Frito Scoops, pizza quesadillas and salad.


Here is the original recipe with link for where I got it from:


Ingredients:

8 ounces cream cheese, softened (light is okay, I used TJ's Soft Spreadable Light)
1 cup mayonnaise (light is okay, I used Best Foods Light Mayo)
6 to 8 ounces grated cheese, divided (I used 7-ounces Blarney Castle Gouda, use your favorite cheese)
1 medium/large sweet Vidalia onion, peeled and diced (about 1 heaping cup)
1 tablespoon ground black pepper
1/4 teaspoon cayenne pepper, optional and to taste
Serving Suggestions - chips, bread, crackers, bagel chips, pita chips, Fritos Scoops, mini toasts, carrot sticks, celery sticks, cucumber sticks, zucchini sticks, jicama, bell pepper wedges, mushrooms, your favorite crudites, or eat by the spoonful

Directions:

  1. Preheat oven to 350F. Spray a 9-inch pie dish (or 1o-inch, or similar-sized oven-safe baking dish) with cooking spray; set aside.
  2. In a large bowl, add all ingredients (except reserve about 1/2 cup cheese to be sprinkled on top) and stir to combine.
  3. Turn mixture out into prepared dish, smoothing the top lightly with a spatula.
  4. Evenly sprinkle reserved 1/2 cup cheese over the top.
  5. Bake for about 45 to 50 minutes, or until top is golden browned, bubbly, and dip is done to your liking (I baked for 47 minutes). Allow dip to cool momentarily before serving. Dip is best warm and fresh, but extra will keep airtight in the refrigerator for up to 5 days. Gently re-heat in micro before serving leftover portion. Read product labels to ensure all products are gluten-free if that's a consideration for you.

http://www.averiecooks.com/2013/11/creamy-baked-double-cheese-and-sweet-onion-dip.html


Tuesday, July 15, 2014

I'm Back!!

So after a long gap, I am back!  I had hoped that my son's allergies would challenge me to be creative and blog even more.  Nope - sometimes going to the grocery store was a matter of real survival.  Surviving reading every label, surviving having to change meal plans mid-store because a vital ingredient was on the 'no-no' list, just trying not to cry.  But God is good and we are seeing some victory!  A few months ago, DS was re-tested and his is no longer allergic to dairy or corn!!!!!  Soy had improved but we still have to be careful; too much and he's red/itchy again.  This is really difficult but at least I don't feel guilty about it anymore if I make a bad judgement call.  I just learn and move on.  We have added one more allergy, though and that it peanuts.  Our allergy dr does not anticipate serious reactions that would cause troubles breathing but just more skin troubles.  From the time he accidentally got a hold of a sandwich, it appears he will probably throw it up and then turn red.

So, I tried a new recipe today!  Wow - I'm definitely a mom if I can go from talking about throw up to new recipes in the next sentence!  If you haven't lost your appetite you'll want to check out these Banana Oatmeal Cups with Chocolate Chips!


Not sure why my picture is so blurry but in this bowl we have bananas, milk, egg, baking powder, instant oatmeal (quick 1-minute cook) and vanilla.

Now add some chocolate chips:
(I used close to 1/2 cup because mine were chunks, not mini-chocolate chips)


Even though DS can have dairy, most chocolates have soy in them so I still use these for baking things he will be eating:


Sorry for the upside down picture!


Then you wait... here's the precious little guy waiting for his muffins!


Breakfast today was Banana Oatmeal Cups with Dairy-free/Soy-free Chocolate chunks and watermelon from our next door neighbor (for local readers he has the fruit/veggie stand that sets up in the parking lot of Radio Shack/Kelderman Electronics on A Ave)


  • 3 mashed bananas (the more ripe the better!)
  • 1 cup vanilla Almond milk (any milk should work)
  • 2 eggs
  • 1 tbsp Baking powder
  • 3 cups (240g) Old Fashion or Rolled Oats
  • 1 tsp vanilla extract
  • 3 tbsp (42g) mini chocolate chips
Preheat oven to 375 degrees
Mix all ingredients except the chocolate chips together, and let sit while you prepare the muffin pans.
Spray a muffin pan and/or liners with with non-stick spray.
Stir the chocolate chips into the oatmeal batter.
Divide batter into 15 muffin cups. They should be just about filled.
Bake 20-30 minutes, you’ll see the edges just starting to brown and they will be firm to the touch.
The muffins may stick when hot but are removed easily when cooled for a bit.


Here is the link to the original recipe:
http://greenlitebites.com/2009/03/07/banana-oatmeal-cups-with-chocolate-chips/

 Enjoy! 


EDIT:  I made these muffins on a Tuesday.  DD didn't like them because she said she could taste the banana in them (don't ask me - she likes bananas!).  DS loved them and was a chocolatey mess!  I thought they were good as well.  However, Friday morning I went to get a couple for breakfast and one of the muffins had some red stuff on it (it looked like someone drizzled strawberry ice-cream topping on it) and there were several fruit flies around them.  I grabbed a muffin that didn't have the red stuff on it and took a bite.  It tasted funky so I put it back in the bowl and grabbed a healthy alternative, a pop-tart (yes, I was being sarcastic!).  By the end of the day another one had the red stuff on it, there's tons of fruit flies and it's just a yucky looking bowl of stuff.  I'm trying to figure out how to dispose of them without releasing the fruit flies into my house (they're trapped under saran wrap right now!)...


Tuesday, September 10, 2013

Bonus Post - Peanut Butter Cookies

I got a couple recipes I had been working on finished up tonight so you get a bonus post tonight!

As part of DS's allergies, I can use dairy products in baking as long as it is baked at 350 for at least 40 mins.  So when hubby had a birthday I could eat cake!  BUT, I can't eat cookies and you know how you always want what you can't have?  Well, I tried out a cookie recipe with these ingredients as a substitute for butter:


Canola oil and applesauce
(homemade applesauce because all the store bought ones had high fructose corn syrup,
which I can't eat due to DS's allergies)
 
 
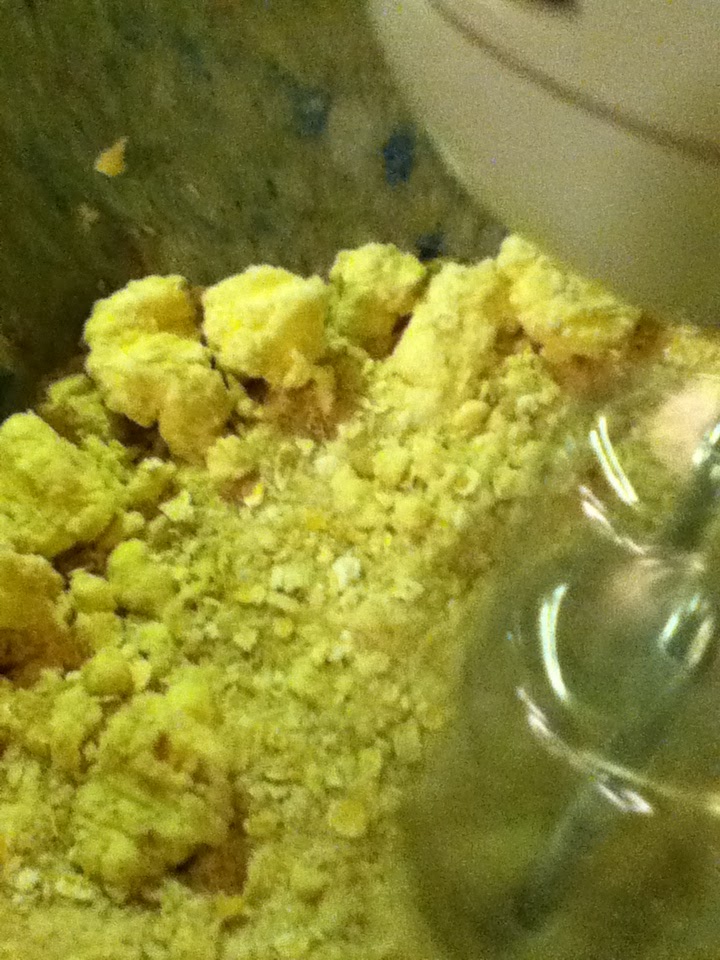
Doesn't this dough look yummy?!
 
 
Baking away!
 
Peanut Butter M & M Cookies
Ingredients:
1 cup (2 sticks) butter
1 cup brown sugar
1 cup granulated sugar
2 eggs
1 1/2 cups peanut butter (creamy or chunky)
2 1/2 cups all purpose flour
1 teaspoon baking soda
1 teaspoon vanilla extract
1 medium-sized bag of M & M's (I used plain, but peanut butter would be awesome!)
Directions:
Mix butter, sugar and peanut butter together.  Add eggs, flour, baking soda and vanilla extract. Fold in bag of M & M's. Roll dough into 1 inch (or a little larger) balls and place on ungreased cookie sheet.
Bake at 350°F for about 10-12 minutes or until golden brown.
Makes 3-4 dozen cookies (depending on how large you roll your cookies).
 
 
The only other adjustment I made was leaving out the M&M's.  I had 3 dozen cookies and enough dough left for just a few more cookies so I added some chocolate chips to them for hubby and DD.
 
It's interesting going to the store as a label reader.  When you don't have to read labels, you can just run in and run out.  Now I have to stop and check everything.  The peanut butter we usually eat is Skippy Natural with Honey.  I didn't want to use my "good" peanut butter for baking so I looked around at some of the cheaper/store brands.  The first one I looked at had corn syrup.  It was the last ingredient so I might have been tempted to try it but it was only the first jar I checked so I looked at another one and this one had molasses instead of corn syrup.  Sounded interesting so I bought it.


Don't these cookies look really good?!  They were and DD loved helping me make them so it was a great day all around!


Zucchini Chips

I had seen several people post on Facebook about making zucchini chips.  Most didn't seem that excited about it but I just had to try it.  The recipe I found was from http://www.thebootblog.net/2012/07/baked-zucchini-chips.html.

I had to modify it slightly due to DS's allergies so I will show what I did but I encourage you to check out the recipe at the above link.

Ingredients needed are shown below:

 
On the plate I have one sliced zucchini.
The bowl closest to the front has 1/4 cup of almond milk.
The bowl in the back has 1/4 cup Panko bread crumbs, 2 Tb of honey wheat bread crumbs, 1/4 tsp each of salt & pepper.  In this batch I also included a little bit of cayenne pepper. 
 
In the second batch I made I left the cayenne out because I thought it was too spicy.  I gave the rest of the first batch to Hubby and with a glass of milk, he survived the first batch!  We both liked the second batch better, although I still thought it was a little spicy.
 
 
Bake at 425 for 30 mins. 
As you can see, batch #1 only made 6 chips. 
For my second batch, I doubled the bread crumbs so I could make a bigger batch.
 
 
Pork chops, homemade applesauce and zucchini chips


Thursday, August 29, 2013

Ironic Crisp

There is some incredible irony in this post.  My husband and I will be celebrating our 7th wedding anniversary next month.  We were good friends for 7 years before that but until we started going out there was one fruit I did not like.

 
Yes, that's right.  Cherries.  I did not like cherries.  Hubby did.  Guess who now likes cherries?
And in my first blog post after discovering our son's dairy, soy & corn allergies I am making a cherry crisp (more aptly called 'ironic crisp').
 
It really is yummy so let's get started!
 
I first made this crisp for our church's annual baptism and picnic.  I felt like it needed more topping so this time I made more topping.  I will tell the measurements I used as I go through but at the end I will put the web address of where I originally got the recipe from so you can check out her recipe, too.  It is slightly different but was the basic inspiration for my recipe.
 
 
2 cups pitted & sliced cherries (I used frozen), 1/3 cup sugar and 1/4 tsp almond extract
marinating together for 15 mins
 
 
For the topping, mix together 3/4 cup flour, 1/3 cup sugar, 1/3 cup brown sugar, 1/4 tsp salt, 1/2 cup oatmeal, 1/4 lb. cold butter and a good sprinkle of cinnamon.
 
Don't those chunks of butter look delish?! 
 
How can I eat this if it has butter, you ask?  The allergy dr told us if a baked item is baked at 350 degrees for at least 40 mins then it is  ok to eat.  This crisp bakes at 350 for 1 hr!
 
 
Ready to bake!  And in case, you are wondering, it's possible to bake this crisp for 15 mins then put in the refrigerator while you and the kids run to Menards with hubby then finish baking when you return home.  Don't ask me how I know!


I was almost done and hubby brought me some of the So Delicious I mentioned in my previous post (chocolate coconut milk ice-cream) to finish up with.  Very sweet combination but all legal!
 
 
Here is the web address for the original recipe:
 
 
Please check out the original recipe as well!
 
And enjoy!


Sunday, August 25, 2013

No dairy, no soy, no corn = no fun! Say What?!

Hey, Everyone!

It's been awhile since I blogged because life has gotten a little crazy. 

I don't write a lot about my kids but I have an 8-month-son that has spent most of his life dealing with eczema.  At first we thought it was just dry skin and our doctor told us a really good lotion to use.  We tried that.  Helped some but not completely.  After he spent a day at my mom's and it was better we thought it was possibly an environmental allergy.  So our doctor gave us a referral to an allergy doctor.

A little over a week ago my husband and I took our little man to his appointment.  They were great to work with and seemed genuinely thrilled to have such a cute little guy to work with.  They asked a lot of questions then explained the testing to us.  As they began to explain the process of putting test spots on his back and having to keep them there and not touch or disturb for 15 mins, it became very clear that it was a good thing we were both there.  If you're not familiar with allergy testing, they make two control spots on your back.  One is just salt water and it just makes the skin slightly red.  The other control is an antihistamine that will bubble up like a bug bite.  Then they have what looks kind of like a sticker that has the test serum on it and they touch those spots to your back and then you wait... They tested DS for dairy, soy, corn, indoor mold, outdoor mold and pet dander.  Hubby held DS on his tummy (like an airplane) and they allowed us to walk the hallways with him so I held DS's hands and talked about random/silly stuff while we walked the hospital hallways for 15 mins.  Before the test was even done, Hubby & I could tell by looking at the test spots that dairy was our big issue (it had bubbled up even bigger than the control spot!).  When the 15 mins was up the nurses came back and measured each spot and took the info to the doctor.  The official results came back as dairy being the main culprit but also lesser allergies to soy and corn, with corn being the least.  On the environmental side, indoor mold was the highest there with outdoor and cat dander being the others.  They were not as concerned about the environmental allergies since the dairy was so obvious.  However, they did encourage us to check under sinks to ensure we did not have any mold hiding anywhere, only take him outside after 3 PM and use All detergent after being around cats (otherwise, continue with my homemade laundry detergent).  So no dairy, no soy and no corn.  Life as I knew it was about to end!  For someone who's favorite foods are ice-cream, pizza and chocolate, I was handed a death sentence.  ok - not quite but I now had the daunting challenge to make some major changes in my cooking.  Why?  What difference does it make what my son is allergic to.  When he's still nursing, it makes a lot of difference!!  8 months is a good stretch of time, why not just switch to formula?  To be honest, I didn't even consider that at first.  I knew it was me that would have to change.  The allergy doctor did mention that if adjusting my diet didn't help we could switch to formula but she was very pro-breastfeeding.   After a few days, I started realizing that most people probably would just switch to formula and almost everyone I knew was probably wondering why I would torture myself when I could easily free myself from munchkin and continue to live a happy dairy-filled life. 

Let's look at the history... I grew up in a home where breast-feeding was the norm.  When I became pregnant with DD, it was a no-brainer; I would nurse for a year.  I wasn't going to go extreme and nurse for years & years (no offense to those that do; that's awesome if that's what you want to do but my goal was a year).  She latched on great and even though I had pain at first it was a wonderful, successful year.  When I got pregnant with DS, obviously I intended to nurse for a year.  As a second time mom, this would be a breeze.  And he had a great suck... if I could get him to latch.  I struggled every feeding in the hospital and thought they were crazy for letting me go home with a baby that couldn't eat.  After a couple frustrating days at home, in which hubby and I both had to work with him to get him to latch, I "gave up" and pumped so we could attend family Christmas without a screaming/crying newborn (and a crying mommy!).  I ended up spending several weeks exclusively pumping.  He drank great from a bottle so I resigned myself to making sure he got "the best"  (breast milk) the only way I could get it to him.  Hubby kept encouraging me to nurse and I resisted, all the while nervously wondering what would happen when I went back to work (I couldn't pump enough to stay ahead at that point in time).  Finally one night DS woke up hungry and I had no bottle in the fridge so out of desperation I tried nursing and what do you know?  He latched and nursed just fine!  I had a can of formula that was given at the hospital in all the freebie's that I sent to daycare for the days I might not have enough milk.  We never needed it and before long we had reached 6 months.  At the beginning I honestly didn't think we had would make it that far.  I was elated!  I have fought to be able to provide my baby with the best he could have.  I can't give that up now.  I have nothing against those who use formula.  Sometimes you have no choice but I will continue to fight for my child to nurse. 

So, a week later, what does this new lifestyle look like?  I was never a big milk drinker so that shouldn't be an issue, right?  Well, it's not just milk; it's diary.  SO, I tried almond milk, which actually isn't so bad and I've discovered that raisin bran with flaxseed, eaten with almond milk is really good and the chocolate almond milk?  Amazing!!  I have also tried rice milk ice-cream, which wasn't too bad but the chocolate coconut milk ice-cream is so yummy I may continue to eat it even after it's ok to back to dairy!!  The tricky thing is usually the non-diary alternative is soy and then seriously, who can live in Iowa and be allergic to corn??!!  Especially when it is in EVERY BLESSED THING!!!  So far I've been eating real basic (like hamburgers/fruit/veggies, pasta) but I'm hoping to branch out a little more.  My new favorite snack is Lay's Kettle Cooked chips with guacamole (Holy Guacamole brand).  My general rule of thumb is eliminate all dairy, most soy and all corn but not be as concerned with some of the things corn is in (like citric acid).  Has it worked?  Oh, my goodness, yes!!  I am craving pizza like you wouldn't believe but my baby boy's skin is already looked majorly improved! 

Besides the food changes, he is on an antihistamine and a med that is basically like Zantac.  Both of those are twice a day.  Then before bed he has to have a bath every night (I thought it would dry his skin out so I wasn't giving him full baths very often), grease him up in Aquafor (and on a 'one week on - one week off' schedule a steroid cream for the worst spots) and put him in long sleeved-footie pajamas to sleep.  I am blown away by how good his skin looks.  He always was a happy baby but now he doesn't scratch all the time! 

The good news is, the doctor said he should out-grow it by the time he's 3 so eventually we should be back to our normal eating in a few years!!  In the meantime, we may develop some healthier eating habits.  And the things I blog about will probably be slightly different as I can't eat all that super sweet, chocolatey stuff anymore.  But I have a really good cherry crisp recipe I can eat that I'm hoping to share with you tomorrow.

I hope this bog, although different from normal, has been interesting to you.  If you have any questions, feel free to ask and if any of you have dealt with these allergies, I'll take tips as well!

Good night, my readers!

Sunday, July 28, 2013

Jello Salad in a Can

 
MMM... fresh pineapple juice from the can!!
 
Did you know if you drain the juice from a can of sliced pineapple and
then replace it with jello you can have a simple jello salad?


To make a jello salad like the one pictured above:
Pour off the juice
Replace with jello made with half the water
Chill until set (I left it in the fridge while we were at church)
Run hot water on the sides and bottom of can.
Cut off bottom of can and use to help push out fruit & jello
Cut between slices and serve


Today's lunch was grilled brats, jello salad in a can and
fresh cucumbers from my mom's garden with ranch dressing.
 
 
Recipe originally pinned from