Friday, June 12, 2015

Smothered Chicken

Time to stop procrastinating.  I made this recipe for dinner last Sunday and I'm just now getting a blog done on it.

Without furthur ado, Smothered Chicken...

To start with, you make a sauce of milk and cheddar cheese condensed soup.


 Thinly slice up some potatoes (4-5 medium - if they're smaller, just guesstimate it.  If you over guess, then you're in good company because we did, too!).  Thank you to DH for slicing for me!


Make 3 layers of potatoes and cheese sauce mix.  Salting and peppering each layer as you go.  
Make no more than 3 layers, though or it will take too long to cook.


Cover tightly with foil and bake for 30 mins.


Meanwhile, chop up some bacon in 1/2 inch pieces (or so!)


Cook the bacon then add some chicken breasts (or chicken breast tenders) to the grease.  
Lightly sear on each side.


When the potatoes are done, put the chicken breasts on top of the potatoes and cover in the rest of the cheese sauce.  Bake 30 mins


Sprinkle with shredded cheese and bacon.  Bake 10 mins or so (until cheese is blubbly)


The original recipe, which I am linking to, was from "South Your Mouth."  When I think of southern cooking, I think 'comfort' and there's some comfort in this recipe, for sure!  I did think it was a little salty because there's several times the original recipe calls for salt, plus the bacon but it was yummy!

 http://www.southyourmouth.com/2014/03/smothered-chicken-cheesy-potato.html?m=1


Saturday, June 6, 2015

Chicken Bacon Ranch Tater Tot Casserole

So it's been awhile since I blogged again but last night we tried a unique recipe that I wanted to share with you.   


When I think 'chicken bacon ranch' I immediately think of Pizza Ranch's Chicken Bacon Ranch wrap and the amazing chips, dipped in ranch, that go with it.  I used to work there so believe me, I know how good it is!

 When I think 'tater tot casserole' I think of a family recipe - What Cheer Casserole.  It's my family's take on tater tot casserole.  My grandma used to always make it when my mom would come down to visit my dad before they were married and because she always had it in What Cheer, she called it What Cheer Casserole and that's what we've always called it.  It's hamburger, ketchup, frozen mixed veggies, cream of mushroom soup and tater tots all layered up and baked.  Love it!


I saw a recipe for Chicken Bacon Ranch Tater Tot Casserole on Pinterest and was intrigued but couldn't bring myself to dare to try a different tater tot casserole.  Well, the 'chicken bacon ranch' part got to me and I just had to try it!  I've had the ingredients for almost a week before I finally got a chance to try it!  This was my status on Facebook last night:   "Can't go wrong with chicken, bacon, ranch, potatoes and cheese, right? Well, I'm hoping so because I tried a new recipe tonight!"

So I got out this pan (which holds nostalgia as well because my great-aunt had bought it for me as a wedding present and then she passed away the Sunday before our wedding):


To the pan, I added 1/2 bag of frozen (thawed) corn, a bag of frozen (thawed) peas, large can of chicken with rice soup and 2 cooked chicken breasts.


Add some milk, sour cream and liquid ranch:


Doesn't that look good?!

Add some tater tots


I didn't get a picture of this but you also add shredded cheese and cooked bacon.

Bake and eat!


Ingredients
  • 1-2 cups cut up chicken breast
  • ½ cup ranch dressing (the liquid ranch in a bottle)
  • 8 oz. shredded cheese (your choice of kind)
  • 4-6 slices of bacon (add more or less as you wish)
  • Tater Tots
  • 1 cup sour cream
  • ¼ cup milk
  • 1 26 oz. can of chicken with rice
  • 15.25 oz can of corn
  • 15 oz. can of peas
Instructions
  1. First you're going to want to cook up the chicken. I usually cook mine in a frying pan. While that's going you can get the rest of the items ready. Get a 13x9 baking dish or something close to that size. Put the corn, peas, chicken with rice and the chicken in the baking dish and mix it up. Make sure to drain the peas and corn before putting them in.
  2. In a separate bowl mix the milk, sour cream and ranch together. Pour that in with the rest of the ingredients that are in the baking dish. Mix that all together. It will look a bit soupy, but that's okay. Once it cooks it won't look that way.
  3. Next you're going to want to top it off with the tater tots. Then sprinkle the cheese over the top. Next you will want to cut up the bacon in small pieces and sprinkle on top as well. I use already cooked bacon with mine.
  4. The oven can be preheated to 400 degrees or you can check the package of tater tots and cook at that temperature. Bake for about 20-30 minutes or until the tater tots are golden brown. ENJOY!
http://kathyssavings.com/chicken-bacon-ranch-tater-tot-casserole/


Official Opinion:  This is a unique recipe.  I love the flavor of using the liquid ranch instead of just a ranch dressing packet.  The combination of everything left DH and I thinking, "not bad but not too worried about making it again soon."  DD loved it and actually had seconds when I made it yesterday and asked to have it for lunch today!  That's pretty good because she doesn't usually respond to new recipes that way.  DS must have liked it, too because it took him forever to eat his serving because he kept stopping to say, "Yummy!  Yummy!"  He has not been thrilled about left-overs today, though.  But hey, he hasn't thrown it on the floor and stomped on it like he did with the quiche so we're making progress!


Enjoy!!  


Sunday, May 17, 2015

Asparagus Quiche

Don't let the title fool you, there is a lot more than asparagus in this quiche but because I had quiche from the CSA, and eggs from the CSA as well,  I decided to do some Pinterest searching for quiche recipes.  Found this one and it was yummy so let's begin!

"Let's start at the very beginning!  A very good place to start!"

And so we begin with a pie crust ...


Sautee some mushrooms


Boils some asparagus


Mix eggs and heavy cream  (sorry for the blurry picture)


Add other goodies


To the eggs and heavy cream I have added green onions, a red pepper, cheese (the original recipe called for a white cheese like jack or meunster but I couldn't find it pre-shredded so I used colby-jack), asparagus, mushrooms and bacon (only 3 strips instead of 6 because as I explained in a previous post, I confused myself with all my similar recipes this weekend and ended up short some ingredients).  

I was under the impression from the original recipe that this would make one quiche but I ended up with enough for 2.  Maybe I should have bought deep dish crust ...

Anyway, here they are baking away with the original recipe and link below:


Ingredients
  • 1 store bought prepared pie crust
  • 8 ounce sliced mushrooms
  • 1 tablespoon oil
  • 1/2 pound asparagus cut into 2-inch pieces
  • 6 large eggs
  • 3/4 cup heavy cream
  • 4 green onions, sliced
  • 1 roasted red pepper, sliced
  • 1 1/2 cup white cheese, shredded (jack and muenster)
  • 6 strips of smoky bacon, cooked and cut into bite size pieces
  • salt and pepper
Instructions
  1. Preheat oven to 375 degrees.
  2. Spray a removable bottom tart pan with non stick cooking spray.
  3. In a medium skillet saute mushrooms with oil until golden.
  4. Set aside to cool.
  5. Fill a medium saucepan with enough water to cover the asparagus.
  6. Bring water to a boil; add asparagus and boil 1 minute.
  7. Drain immediately and set aside to cool.
  8. Roll out the prepared pie crust, press into the sides of the tart pan. 
  9. In a large bowl lightly beat the eggs, add the cream and stir together.
  10. Add the onions, red pepper, shredded cheese, cooled mushrooms, cooled asparagus and bacon.
  11. Salt and pepper to taste.
  12. Gently fold all ingredients together and pour into prepared tart pan. 
  13. Set pan on a cookie sheet, bake 50 minutes or until a knife inserted into the center comes out clean.
  14. Cool in the pan 15 minutes before removing the tart pan sides.

http://www.ladybehindthecurtain.com/asparagus-bacon-quiche/


So here's the finished product:
I really liked it.  Hubby made it through almost 2 pieces by heavily covering it in ketchup.  DD picked out the asparagus/pepper/mushroom and ate eggs/cheese/bacon.  DS ate most of one whole piece before putting the rest on the floor and stomping on it.  So anyway, here's that promised pic:


Spinach Chips

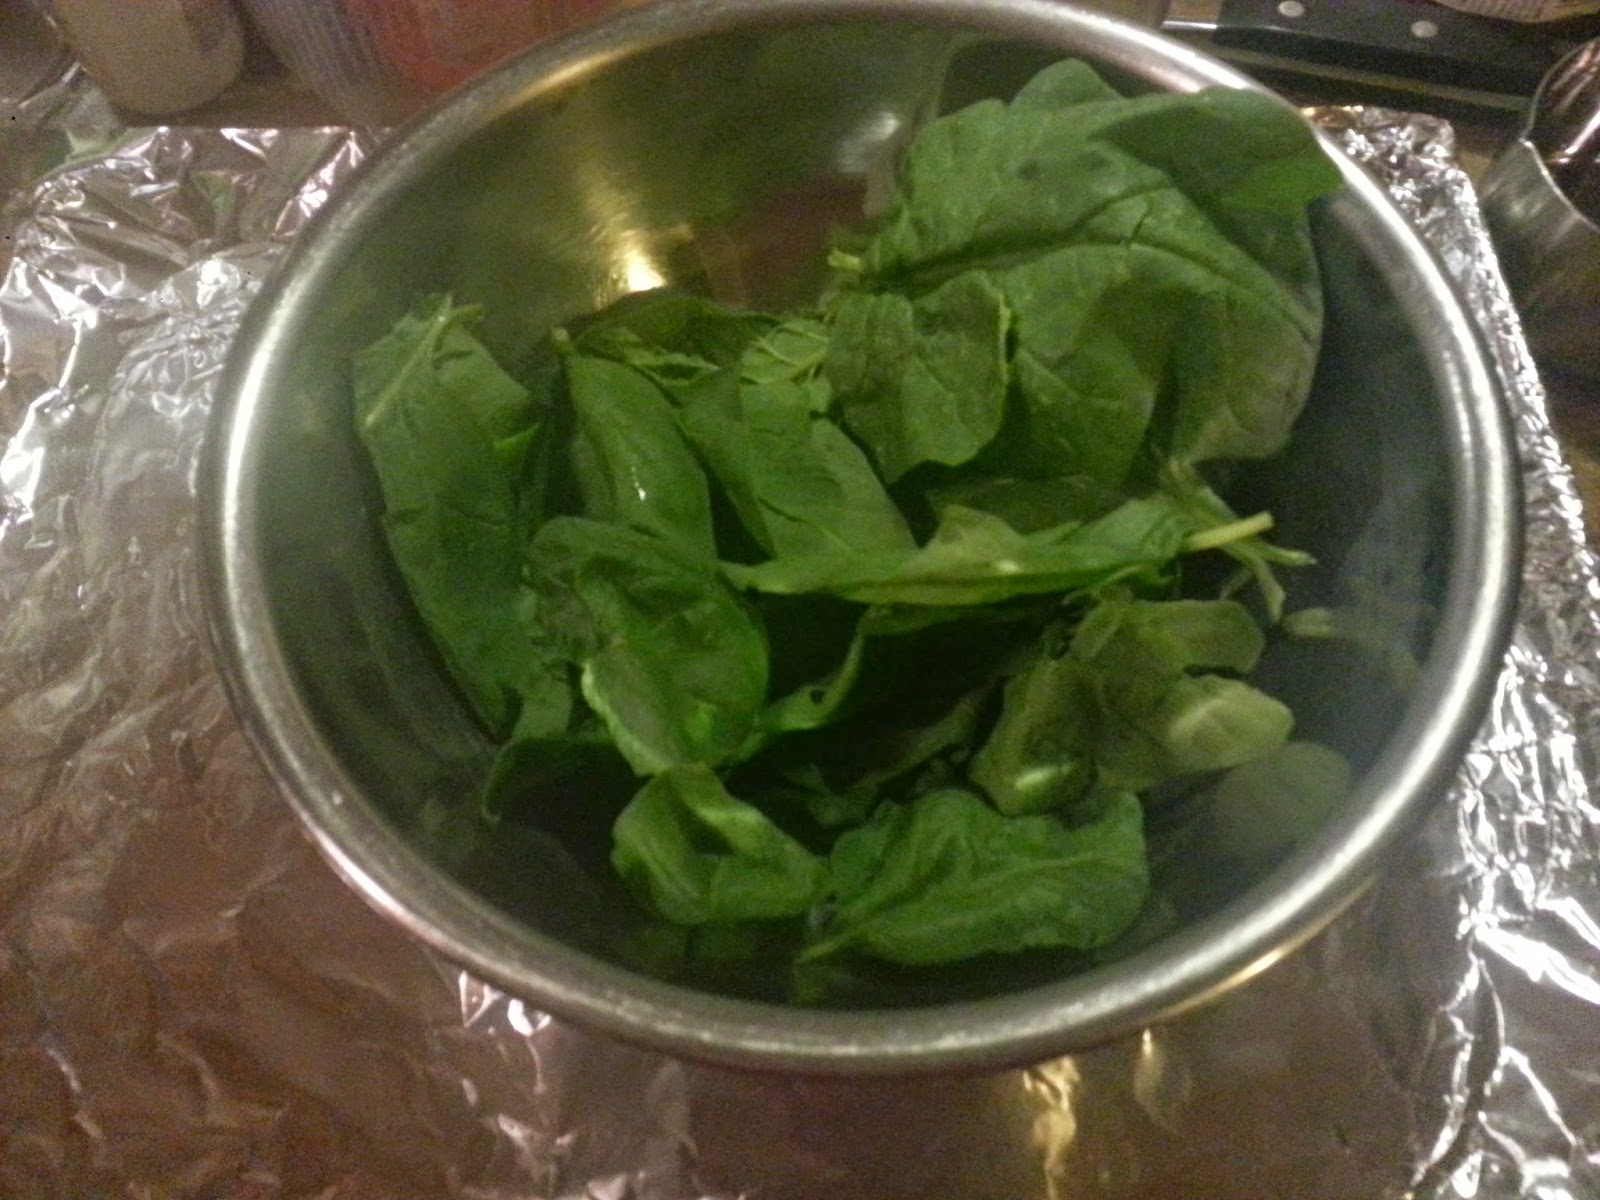
This year, my family and I were gifted a half-share in a CSA.  For those not familiar with what a CSA is, it stands for Community Supported Agriculture.  You pay in for a full or half share and then whatever they harvest, is divided between those that have shares.  So far, we have received a lot of salad greens!!  I'm the only one that likes them so I've been eating lots of salads.  Last week we also received some spinach, which can obviously be added to salads but I wanted to try something different.  I searched on Pinterest for spinach and found this recipe for spinach chips.  I have heard of kale chips so I was intrigued to try these.


Start by covering a baking sheet in foil.


2 cups of spinach


Coated in oil and seasoned with Italian seasoning and salt


Baked at 325 for 8 mins.  Let set for 2 mins.


Official Opinion:  They were tasty.  Very flavorful.  Some of the spinach leaves I had were very large so I'm thinking they should have baked longer because they didn't get very crispy.  I ate almost the whole batch myself because no one else wanted them and that was almost too much.  There were a few left this morning  so I tried a couple and they still tasted very good but were not as crispy as last night.  I think this would be a good recipe to make a small batch for a snack in the evening but not to make large batches at a time.


Ingredients
  Spinach leaves 2 Cup (32 tbs) (big, healthy looking leaves)
  Extra virgin olive oil 1 Tablespoon (as reqired)
  Italian seasoning blend To Taste
  Salt To Taste
 
Directions
GETTING READY
1. Preheat the oven to 325 degrees F.
2. Line a baking sheet with foil. Set aside.
MAKING
3. In a bowl, put the spinach leaves. Put olive oil and mix it well without breaking or tearing the leaves.
4. Sprinkle salt and Italian blend and mix well till all leaves are coated.
5. Take the foil lined baking sheet and arrange the leaves in a single layer without any overlaps.
6. Bake in the oven for 8 minutes. Remove from the oven and let it sit on the baking sheet for another 2 minutes.
7. Using a spatula, transfer them into a bowl or plate.
SERVING
8. In a serving bowl or plate, serve the spinach chips with a nice dip and a refreshing beverage.

TIPS
Make them in batches. Do not overcrowd the baking sheet. Every leaf should be exposed to the heat.

Read more at http://ifood.tv/italian/467583-italian-herb-baked-spinach-chips-healthy-snack-idea#qLKqeic0zbAQfej2.99


Mississippi Mud Potatoes

What comes to mind when you hear 'Mississippi Mud?'  I'm guessing you're not thinking about grabbing a plate & fork and digging in.  You just might change your mind after this post.

The ingredients for this mud is as follows:
Potatoes
Cheese
Bacon
Onions


8-10 cups of diced potatoes
approx 16 oz of cheese (I used some cheddar and colby-jack)
3 strips of diced bacon
1/2 cup of little green onions (I used the onions and the tops)

The original recipe called for all cheddar cheese and a whole package of bacon but I had several recipes I'm doing this weekend that called for similar ingredients and I think I confused myself because I ended up short some of the ingredients.

The dressing for this casserole is really easy:


One cup of real mayo.  At our house, Miracle Whip is all there is.

Mix it all up and bake at 325 until the potatoes are tender, about 1 1/2 hrs.  The original recipe didn't say whether to cover or not so I didn't but I should have because after 1 1/2 hrs they were still a little crunchy so I covered them and ended up baking for another 25 mins.  They could have been more tender but we were all getting hungry so we called it good.

I never know if I should cover a dish or not if it doesn't say.  How do you know??

Anyway, it came out pretty good.  As to why it's called "Mississippi Mud" :   “They’re named for the famous river because they’re LONG on taste and MIGHTY good!”


Served with my mother-in-law's sloppy joes recipe (lb of hamburger, undrained can of chicken gumbo, 3 Tbsp of brown sugar and some ketchup), asparagus from the CSA grilled with garlic powder/salt/pepper and watermelon.


  1. 8-10 Cups potatoes, diced finely
  2. 16 ounces cheddar cheese, cubed or shredded
  3. 1 Cup mayonnaise (real)
  4. 1 package bacon, cooked and torn into large bits
  5. 1/2 Cup green onions, chopped
Instructions
  1. In a 9x13 pan or 3 quart casserole dish, mix potatoes, cheddar cheese, bacon, and green onions.
  2. Stir in mayonnaise.
  3. Bake at 325 for an hour and a half or until potatoes are tender. Top with additional cheese if desired.
 http://www.mamaplusone.com/mississippi-mud-potatoes/

Monday, April 27, 2015

Pink Lemonade Cake

Pink Lemonade Cake - I had never heard of it but it sounded good.  I mean, really?  Can you go wrong with cake and pink lemonade?  You got your sweet and sour all together!

It took me awhile to get to making it but yesterday was the day!  It was a unique experience. 

First off, the recipe called for this:


Setting my butter and eggs out at room temperature for 30 mins before making the cake.  The brown eggs are from our friends that have a farm and do a CSA, which we have a 1/2 share in this year.

So I let it sit out and then you're supposed to beat the butter with a hand mixer for 30 seconds.  I kept clogging up the mixer.  It wasn't whipping up like I thought it should.  Then gradually add sugar.  What this picture does not show is the huge mess I made all over my counter.


Getting better (the beaters aren't as clumpy):


Got everything all mixed together and turned it pink!


Bake.  The recipe says 30-35 mins but it probably took more like 45 mins.  Admittedly, my oven needs cleaned so that may be why it took longer.


Let cake cool while taking children outside to play in the mud puddles and blow bubbles.
Come inside and have supper:


It was snack food night so we had Orange glazed little smokies ( http://www.tasteofhome.com/recipes/orange-glazed-smokies) which have been a favorite of ours since I found them shortly after we got married, croissants and carros/dip.  Kids also had apple slices.  Well, DD did but DS refused his fruit and veggies so he did not get to try this cake.  But anyway ...

After supper DD and I resumed our cake baking by making the frosting.  This was the first time she had seen anyone make frosting and it was an interesting concept for her.

First you start with softened butter (or melted butter if you're like me and microwave it too long):


And now for all the yummy powdered sugar! 


Official opinion:  It is a dense cake and the lemon flavoring was almost overpowering.  I normally really like lemon stuff but I was surprised at how strong the flavor was.  But there is pink lemonade concentrate in the cake and frosting.  Plus, I didn't have buttermilk so I made the buttermilk for the cake and I discovered that instead of using vinegar like I was accustomed to, you can use lemon juice so I did.  So yeah, lemon overload.  But it was good.  A lot of work for a 'just because' cake but worth it if you had a special event that called for it.

Here is the full recipe and link to original website:


Recipe from Better Homes and Gardens- Lemonade Cake
Ingredients
    For the Lemonade Cake:
  • 1/3 cup butter
  • 3 eggs
  • 2 1/4 cups all-purpose flour
  • 1 teaspoon baking powder
  • 1/2 teaspoon baking soda
  • 1/2 teaspoon salt
  • 1 1/3 cups sugar
  • 1/4 cup frozen pink lemonade concentrate, thawed
  • 1 teaspoon vanilla
  • 1 1/4 cups buttermilk or sour milk
  • Red food coloring (optional)
  • For the Lemon Butter Frosting:
  • 1/3 cup softened butter
  • 1 cup powdered sugar
  • 1/3 cup frozen lemonade concentrate, thawed
  • 1/2 teaspoon vanilla
  • 3 cups powdered sugar
  • 1 teaspoons frozen lemonade concentrate, thawed
  • Thin lemon slices (optional)
Instructions
    For the Cake:
  1. Allow butter and eggs to stand at room temperature for 30 minutes. Meanwhile, grease a 13x9x2-inch baking pan; set aside. In a medium bowl stir together flour, baking powder, baking soda, and salt; set aside.
  2. Preheat oven to 350 degrees F. In a large mixing bowl beat butter with an electric mixer on medium to high speed for 30 seconds. Gradually add sugar, about 1/4 cup at a time, beating on medium speed until well combined. Scrape sides of bowl; beat for 2 minutes more. Add eggs, one at a time, beating well after each addition. Beat in pink lemonade concentrate and vanilla. Alternately add flour mixture and buttermilk, beating on low speed after each addition just until combined. If desired, stir in a few drops of red food coloring to get the pink color you desire. Spread batter into prepared pan.
  3. Bake for 30 to 35 minutes or until top springs back when lightly touched. Cool in pan on a wire rack.
  4. For the Frosting:
  5. In a large mixing bowl beat softened butter with an electric mixer on medium speed until smooth. Gradually add the 1 cup powdered sugar, beating well. Beat in the 1/3 cup frozen lemonade concentrate and vanilla. Gradually beat in the additional powdered sugar. Beat in additional frozen lemonade concentrate to reach spreading consistency. Makes 2 cups.
  6. Spread cake with Lemon Butter Frosting. If desired, garnish with lemon slices and cut straws (slices should be removed before eating).

http://www.grandbaby-cakes.com/2014/07/pink-lemonade-cake/


Sunday, April 19, 2015

Interesting Green Stuff, Pt. 2

My previous post about the shamrock shakes happened last Thursday.  Friday morning I didn't have to be at work until later so it was the perfect day to knock out a science experiment I had been wanting to get done.  Starting work even 2 hrs later can be huge to a home-school mom who also works full-time outside the home.  So I wanted to do a color mixing experiment.  Unbeknownst to me, DD (age 5) already knew that blue & yellow make green but she still thought it was cool.  It was entertaining for DS (age 2) as well. 

Step 1.  Fill 2 cups with water.  Put blue food coloring in one and yellow food coloring (which, incidentally looks red in the bottle) in another.


Step 3.  Wait

Once you have waited awhile you should have a pretty green cup in the middle.  However, when conducting this experiment with a 2-year-old in the house, please be warned that it will still work but it may not be pretty.


The medicine cups, etc in front of the glasses were what he decided to play with (ie. get water out of the glasses, try to drink it when Mom wasn't watching).  The green blob shows what happens when the same 2-year-old gets a hold of the blue food coloring that Mom really thought she had put back in the upper cupboard - not pretty but yes, blue and yellow do make green!

I did not get an ending picture but eventually the water and more color did make it's way into the middle glass.


http://fromabcstoacts.com/2013/12/toddler-science-color-changing-experiment.html